Jul 1, 2018 - Connecting my bot to Higgs

Higgs

Higgs is a generic dashboard for viewing and providing feedback to bots found in SOBotics. It originated alongside Boson - a framework for creating SOBotics bots. This blog post will run you through the process of setting up your own bot and integrating it with Higgs.

Setting up a dashboard

Bot setup is now entirely self-service! If you’re not already a bot owner, you’ll need to ask a Higgs admin to grant your account bot privileges. Once that’s done, you’ll be able to create a new bot yourself.

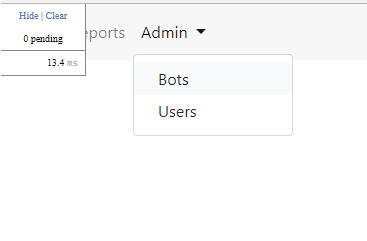
  1. You should now see an ‘Admin’ dropdown in the top left of Higgs:

    enter image description here

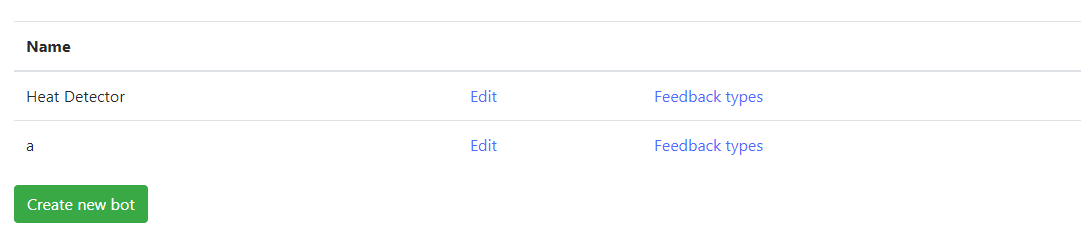
  2. Clicking ‘Bots’ will bring you to the bot management page. Here, you’ll see all bots that you own. Admins are able to see and edit every bot. From here, you’re also able to create a new bot:

    enter image description here

  3. When creating a new bot, you’ll be presented with the following page:

    enter image description here

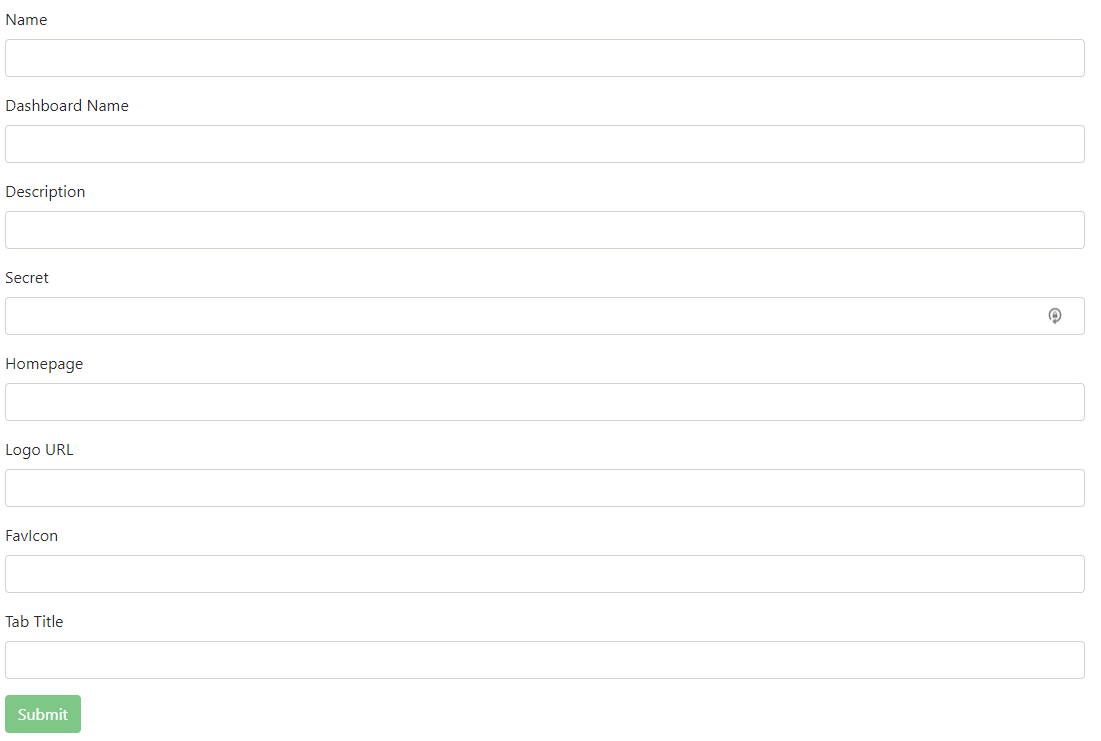
    The following fields are required:

    1. The name of the bot
    2. The dashboard name
    3. The description of the bot
    4. The secret
    5. Optionally, you may also enter:
    • A link to the homepage of the bot.
    • A link to the bot’s logo.
    • A favicon. This will change the page’s favicon when viewing one of your bots reports. Must point to a URL.
    • Tab Title. This will change the page’s title when viewing one of your bots.
  4. Once you’ve submitted your bot, you’ll need to set up the feedback types. You can manage this from the /admin/bots page (as shown above).

  5. You’ll be presented with the following page:

    enter image description here

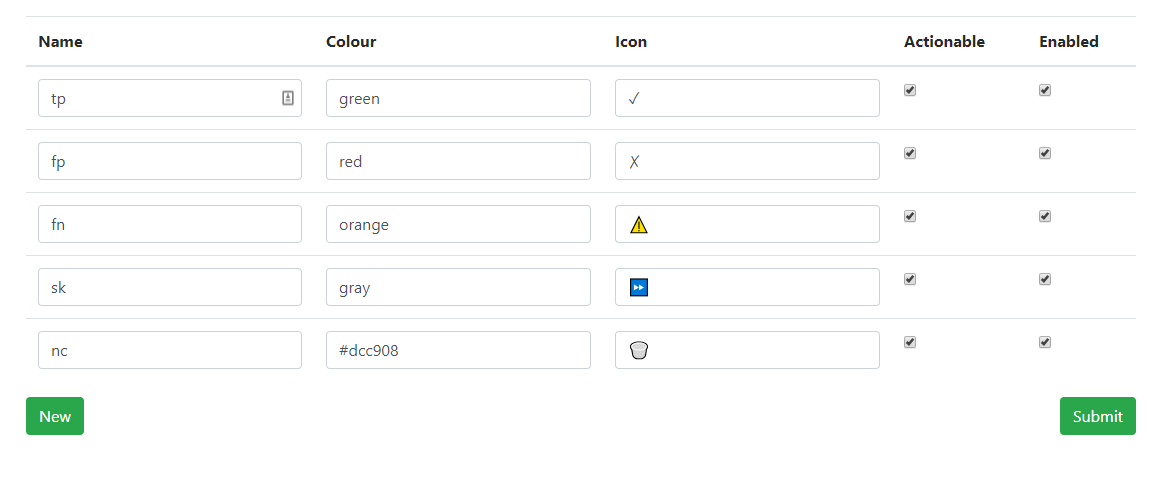
    • Name: The name of the feedback. This is what will be rendered on buttons for reviewers.
    • Colour: A browser-supported colour string. Hex or named colours are supported. Styles the colour of the feedback button, as well as the icon.
    • Icon: An icon to represent already cast feedback. It’s simply a string, and can technically be anything, but we recommend using a Unicode character.
    • Actionable: Whether or not this type of feedback is counted when putting reports into the review queue.
    • Enabled: Whether or not this type of feedback is allowed to be cast by a review.

Getting started in code

Higgs uses swagger to document its API. A benefit of this is that the boilerplate API code can be automatically generated. Here’s an example script being used to generate the API structure for Higgs’ frontend.

Note that the above is entirely optional. Generating the boilerplate is a nice-to-have, and not required. If you’d like to implement the API calls yourself, you can see the available endpoints here, as well as what security is required for each call.

Here’s an example of a bot authenticating itself, and then sending feedback for a user:

// Point the API to Higgs
const string basePath = "http://45.77.238.226";

var botApi = new BotApi(basePath);

// Here, 1 is the ID of your bot. This makes a POST request to /bot/AquireToken
var tokenResponse = botApi.BotAquireTokenPost(1, "THIS IS MY SECRET KEY");

// Now we've got the bot's access token, we need to configure our API to add it to future requests
// If you're not using swagger gen, you need to ensure future api requests add the following header:
// Authorization: Bearer [token]
botApi = new BotApi(new Configuration
{
    BasePath = basePath,
    AccessToken = tokenResponse.Token
});

// Example request after the bot has been authenticated
botApi.BotRegisterUserFeedbackPost(new RegisterUserFeedbackRequest(5, 1, "False Positive"));

The access token is a JWT token, and is currently valid for 7 days. Bots will be able to decode the token to inspect what scopes (permissions) it has been granted, and when the token expires.

May 10, 2018 - Creating a bot account on Stack Exchange

Most, if not all, of the moderation bots maintained on Stack Exchange (by SOBotics and others) report to a chat room. Unfortunately, one limitation of using chat is that the owner of the bot needs a dedicated bot account with at least 20 reputation points, on which the bot post its reports into chat. This is one place where the owner of the bot would be coming very close to performing activities against the Stack Exchange rules, as they are creating a new account separate from their main account.

Fortunately, Stack Exchange has been kind enough to allow us create multiple accounts legally, as long we follow certain rules. The official rules for creating a new account for a bot are detailed in this meta post. From there:

So long as there’s no voting or other dubious-looking stuff (like one account asking a question and another immediately answering it) going on between the accounts, it’s really not a big deal.

You are allowed to create an additional account for a bot, as long as you adhere to the policies for having multiple accounts:

It is not a problem to have multiple accounts, as long as they aren’t voting for each other and doing other sockpuppet-y things.

Activities which are considered “sockpuppet-y” include:

  • Voting on your own posts or comments
  • Answering your own questions with the other account(s)
  • Casting multiple votes on others’ posts or comments
  • Supporting your own arguments (“+1: shog is right, don’t know why the rest of you don’t realize this”)
  • Using bounties to circumvent the rep cap
  • Circumventing suspensions, quality bans, or the rate limits on posting questions / answers / comments / etc.

How do I earn reputation for the bot to participate in chatrooms?

For a user to be able to speak in chat, they need 20 reputation. The proper way to earn this 20 reputation is listed here.

If you want a sockpuppet to have reputation, then earn it. That’s what I do with my sockpuppets, and I certainly have a lot more opportunities to abuse the system than y’all do. If you can’t play it straight while creating your bot, what confidence can we have in the bot being honorable once it’s up and running?

Two options for getting the required reputation for your bot are:

  1. Suggest 10 edits, and get all of them approved through the suggested edit queue. Do not interact with any of these suggested edit reviews yourself. Namely:

    1. Suggesting an edit on your own post and immediately accepting it.
    2. Clicking “Improve Edit” on an edit suggested by your bot to circumvent the review process.
    3. Reviewing “Approve” on a edit suggested by your bot.
  2. Add an answer/question and wait until it gets sufficient votes. Here as well, do not interact with the post in any way, such as:

    1. Adding an answer on your own post and accepting it.
    2. Voting up the answer/question posted by your bot.
    3. Adding an answer to the question asked by your bot.
    4. Voting up any comments left by your bot.
    5. Commenting on any posts created by your bot.

The first option is recommended as there are not many conditions associated with it. Similarly, creating a bot account on Stack Overflow is preferred as it can speak on both chat.stackoverflow.com server and chat.stackexchange.com server.

What do I do after creating a bot account and gaining 20 reputation?

After creating a usable bot account, remember to follow the directions presented in the above linked meta post:

Add a note in the “About me” section describing the purpose of the account.

Your bot is now ready to roll. Keep a few things in mind:

  1. Do not use the bot to star other people’s - or your own - messages.
  2. Do not use the bot to perform sockpuppet-y activity.
  3. Adhere to the Be Nice policy enforced in chat, even when not posting from your main account.

The bot account is no different from a normal user account, except that there is no human behind the screens who’s sending those messages. All rules that apply to a normal user also apply to the bot account.

May 8, 2018 - Introducing the SOBotics Blog

Exactly 2 years ago, on May 8th, 2016, a group of enthusiastic users decided to tackle the problem of not having enough filters while reviewing close votes by creating a chatbot. This chatbot was named SOCVFinder. And thus, SOBotics was born. Today, with numerous different robots, working 24/7 to continuously monitor Stack Overflow, the name of SOBotics has become synonymous with moderation chat bots. Now there are robots which not only help to filter close votes, but also help to detect low quality questions, flag non-answers, expose rude comments, catch plagiarism, report vandalism, and much more.

Having a plethora of different projects, and with numerous developers continually working on them, SOBotics has also now become a resource for spreading knowledge about the creation of chat robots for Stack Exchange. Many users visit the chatroom to learn about how the different bots work, to learn about how to connect to the Stack Exchange API to retrieve the data that they want, and how to create new robots for different sites. The room regulars soon noticed that it would be beneficial if this knowledge was available on a better platform rather than buried in chat transcripts. This idea has now been materialized in the form of a blog.

This blog will contain helpful articles about interacting with both Stack Exchange APIs and the different libraries available for interacting with chat, as well as providing a home for the various rules and regulations regarding the etiquette to be followed while in the chatroom.

Two years have gone by in a jiffy, and with many more exciting years to come by, we hope that this blog will be beneficial to users far and wide. We would like to thank the Stack Exchange team, the Community Managers, the developers, the reviewers and all the users for their support, without which this would not have been possible. Thank you!